There’s something truly magical about creating desserts that are simple yet delightful. When I first stumbled upon the concept of 2 Ingredient Cookie Cups, I was intrigued. How could something so easy be so delicious? Picture this: a cozy evening, a few friends around, and a craving for something sweet. I wanted to whip up a treat that wouldn’t keep me in the kitchen for hours. That’s when I decided to give these cookie cups a try. They turned out to be a hit! With just two main ingredients, I was able to create a dessert that not only satisfied our sweet tooth but also sparked conversations and laughter. The best part? They are as fun to make as they are to eat. So grab your ingredients, and let’s dive into making some amazing 2 Ingredient Cookie Cups!
Recipe Snapshot
60 mins
0 mins
0 mins
Medium
120 kcal
1g g
Keto, Gluten-Free, Low FODMAP
7g g
Frying Pan, Baking Sheet, Oven
Why This 2 Ingredient Cookie Cups Shines
Quick and Easy
One of the reasons I absolutely love 2 Ingredient Cookie Cups is how quick they come together. With just two ingredients, you can have a delicious dessert ready in no time. No need for complicated measurements or lengthy prep times; it’s a straightforward process that yields fantastic results.
Customizable and Versatile
Another fantastic aspect of this recipe is its versatility. You can experiment with different flavors of cookie dough and candies. Whether you prefer the classic chocolate chip or something more adventurous, the options are endless. You can even switch out candies based on your mood or occasion!
Fun for Everyone
This recipe is not just about taste; it’s also about the fun of making it. Kids can easily get involved, making it a great family activity. It’s incredible to see their creativity shine through as they choose which candies to use. Everyone will have a blast creating their personalized cookie cups!
Perfect for Any Occasion
Whether it’s a birthday party, a casual get-together, or simply a cozy night in, 2 Ingredient Cookie Cups fit right in. They are great for sharing and can be the star of dessert tables or just a sweet little treat for yourself after a long day. They are perfect for any occasion!
Minimal Cleanup
Who doesn’t appreciate a dessert that doesn’t leave the kitchen in shambles? These cookie cups require minimal equipment, meaning less cleanup for you. You can enjoy your sweet creation without the hassle of extensive washing up afterward, leaving you more time to savor your treat.
Great for Gifting
If you’re looking for a simple yet thoughtful gift, these cookie cups are ideal. Package them up nicely, and you’ve got a delightful homemade present that anyone would love. They’re perfect for holidays, celebrations, or just to brighten someone’s day.
What’s In This 2 Ingredient Cookie Cups
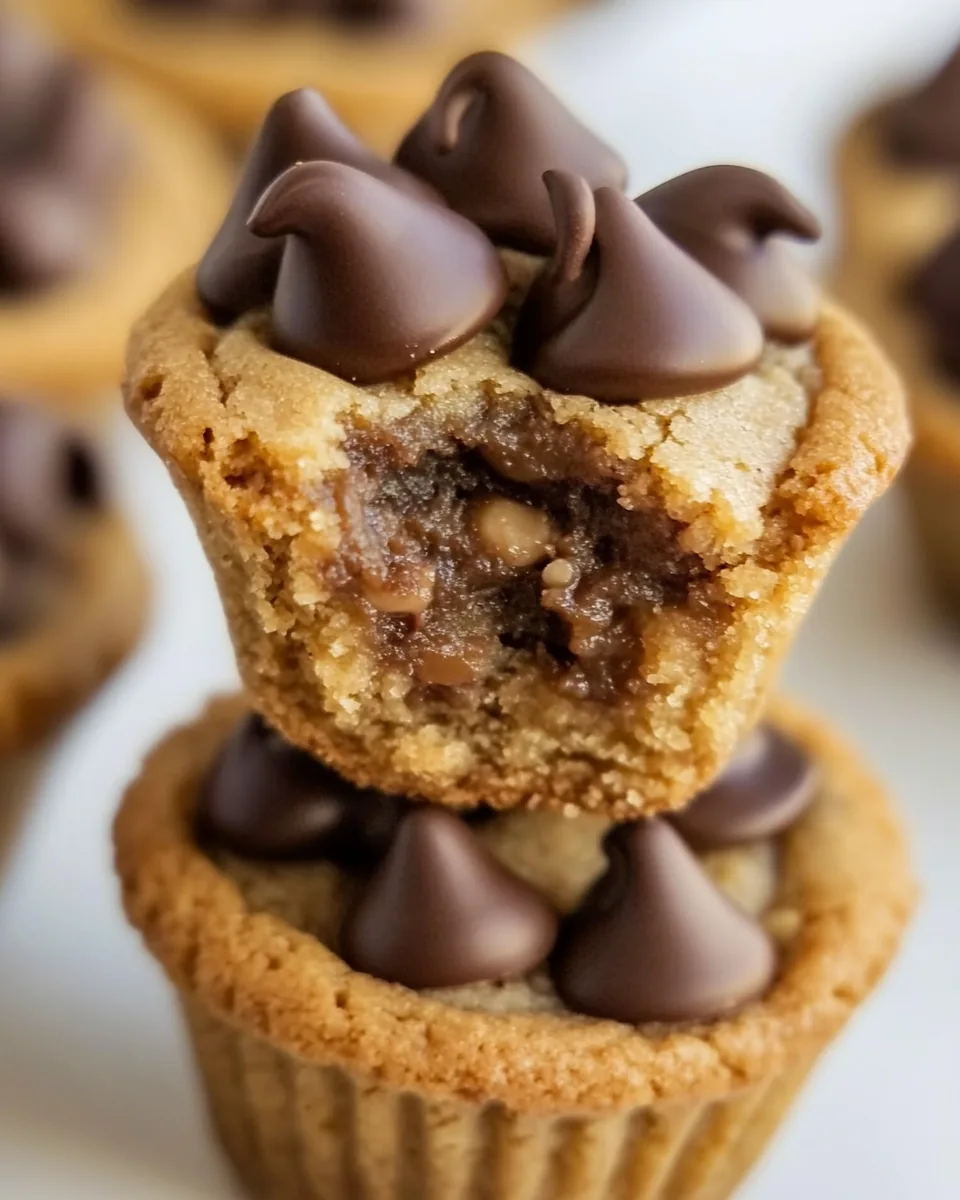
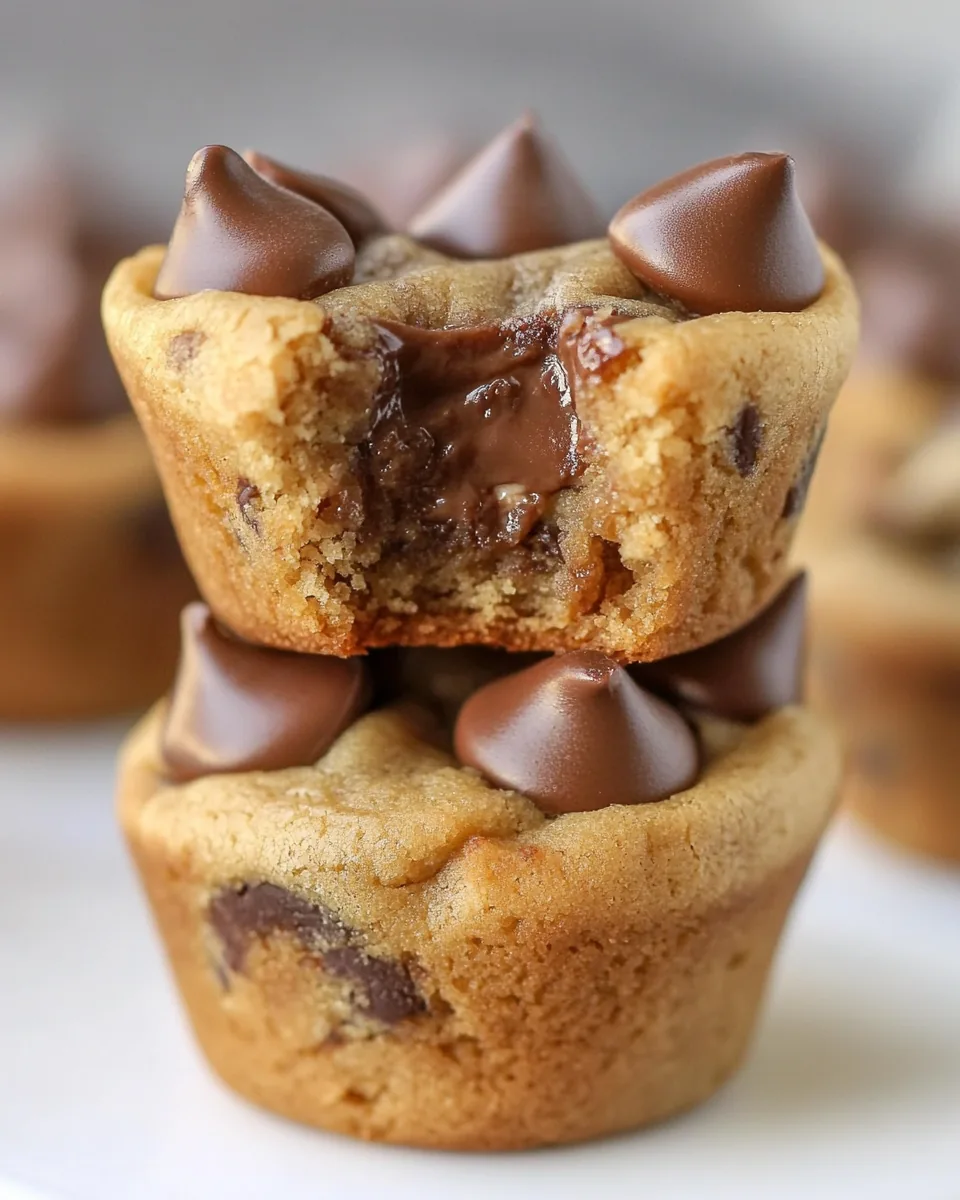
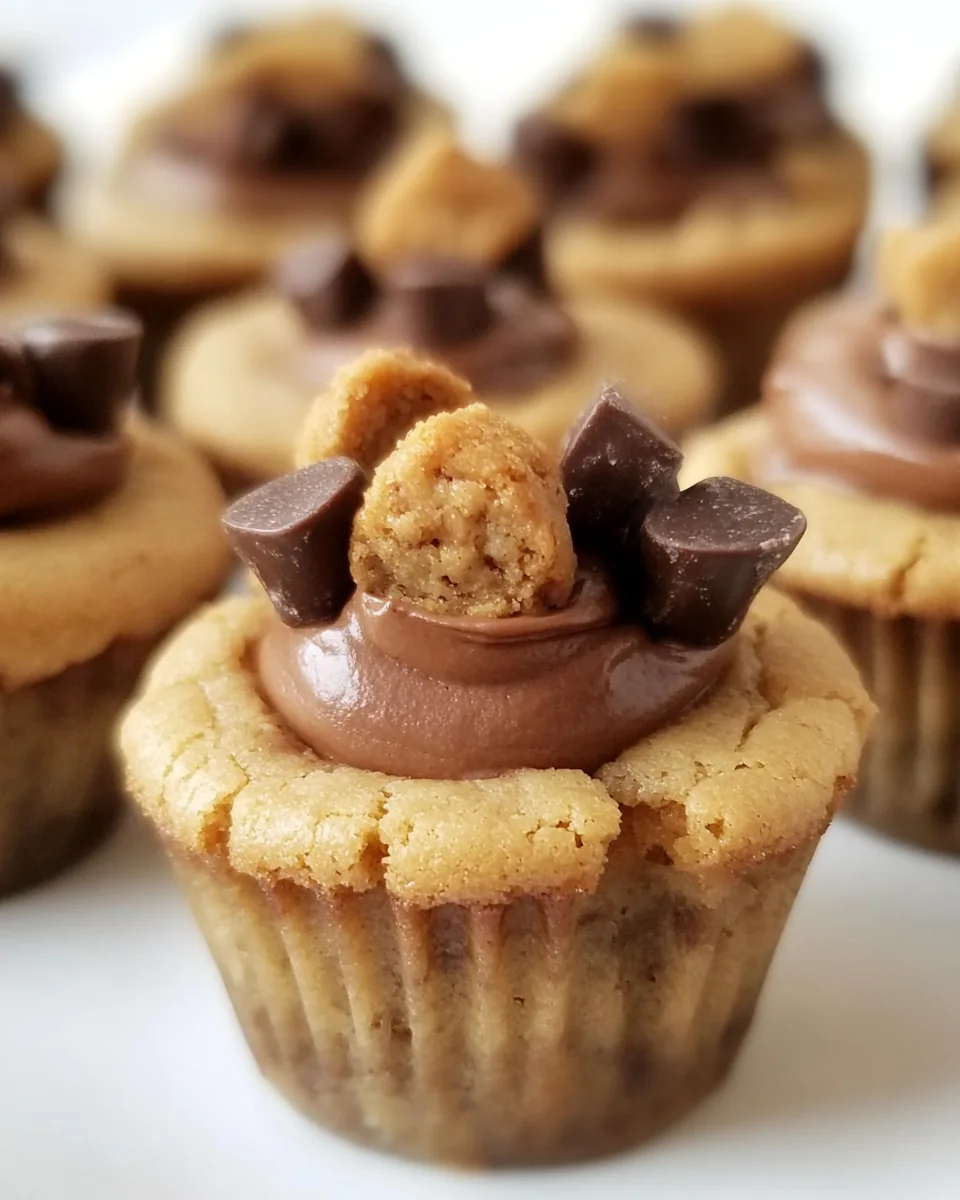
The beauty of 2 Ingredient Cookie Cups lies in their simplicity. With just two primary ingredients, they come together to create a satisfying treat. The star players here are the refrigerated ready-to-bake cookie dough squares and various candies. The cookie dough provides that warm, comforting base, while the candies add a burst of flavor and fun, transforming each cup into a delightful surprise.
- 24 count refrigerated ready-to-bake cookie dough squares: This is the foundation of your cookie cups. Soft, chewy, and oh-so-delicious, these squares are designed to be baked straight from the package, making them a fantastic time-saver.
- 24 candies: You can use any small candies such as Reese’s Peanut Butter Cups, Junior Mints, Hershey’s Kisses, or Rolos. These add a sweet surprise in the middle of each cookie cup, making every bite a delightful experience.
Making 2 Ingredient Cookie Cups

Creating 2 Ingredient Cookie Cups is as fun as it is easy! Follow these simple steps, and you’ll have a batch of delicious cookie cups ready in no time. Let’s get started!
- Preheat your oven to 350°F. It’s essential to get your oven hot enough so that your cookies bake evenly and become golden brown and delicious.
- Spray mini muffin pans with nonstick cooking spray. This will ensure that your cookie cups come out easily without sticking to the pan.
- Place one cookie dough square in each mini muffin cavity. Make sure to press it down slightly so that it forms a nice cup shape as it bakes.
- Bake for 12 to 14 minutes, or until the cookie edges are golden brown. Keep an eye on them as baking times can vary based on your oven.
- Once baked, remove the pans from the oven and immediately place an unwrapped candy in the center of each cookie cup. The warmth of the cookie will slightly melt the candy, making it gooey and delicious.
- Let the cookie cups cool completely in the pan. This step is crucial as it helps them set properly and makes it easier to remove them.
- Carefully remove the cookie cups from the pans. A small spatula can help to lift them out without breaking.
- Store any leftovers in an airtight container for up to 3 days. If you want to keep them longer, you can freeze them for up to one month.
- Enjoy your sweet creations with friends and family. Share the joy and watch everyone’s faces light up with delight!
Things Worth Knowing
- Use High-Quality Dough: Opt for a good-quality refrigerated cookie dough for the best flavor. Brands can vary significantly in taste and texture.
- Experiment with Candies: Don’t hesitate to try different candies. Some might melt better than others, creating unique flavors!
- Keep an Eye on Baking Time: Every oven is different. Some may bake faster, so check your cookie cups a minute or two early.
- Don’t Overfill: When adding candies, ensure not to overfill them. You want just enough to create a delicious surprise without spilling over.
Substitutions and Tips
Whether you’re looking to tweak the recipe or just need some helpful pointers, here are some tips for making the perfect 2 Ingredient Cookie Cups.
- Storage: Store your cookie cups in an airtight container to keep them fresh. They stay good for about three days at room temperature.
- Freezing: You can freeze the cookie cups for up to one month. Just make sure to use a freezer-safe container to avoid freezer burn.
- Pairing: These cookie cups pair wonderfully with a scoop of vanilla ice cream or a glass of milk. They make for a fantastic dessert combo!
- Flavor Combinations: Consider using flavored cookie dough if you want to switch things up. Sugar cookie dough with fruit candies can be especially delightful.
- Decorating: Feel free to decorate your cookie cups with sprinkles or a drizzle of chocolate for an extra touch of sweetness and color!
What Goes Well With This 2 Ingredient Cookie Cups
When it comes to serving 2 Ingredient Cookie Cups, there are plenty of ideas to enhance your dessert experience. Here are some suggestions:
- Ice Cream: Serve your cookie cups warm with a scoop of your favorite ice cream on top for a delightful contrast of flavors.
- Milk: A classic pairing! The sweetness of the cookie cups is perfectly complemented by a glass of cold milk.
- Fruit Salad: For a lighter option, serve these cookie cups alongside a refreshing fruit salad. The sweetness of the cookies pairs beautifully with the natural sweetness of the fruits.
- Special Occasions: These cookie cups are perfect for birthday parties, holiday gatherings, or any celebration. They’re a hit with both kids and adults!
- Picnics: They’re also great for a picnic or a casual outdoor gathering since they’re easy to transport and serve.
- Gift-Giving: Package some in a decorative box or bag as a thoughtful homemade gift for friends or family!
FAQ
Conclusion
The 2 Ingredient Cookie Cups are not only quick and easy but also a delightful treat that brings joy to any occasion. With such simple ingredients, you can create a sweet masterpiece that’s sure to impress. I encourage you to give this recipe a try—your friends and family will thank you for it!
2 Ingredient Cookie Cups
Ingredients
Equipment
Method
- Preheat your oven to 350°F. It’s essential to get your oven hot enough so that your cookies bake evenly and become golden brown and delicious.
- Spray mini muffin pans with nonstick cooking spray. This will ensure that your cookie cups come out easily without sticking to the pan.
- Place one cookie dough square in each mini muffin cavity. Make sure to press it down slightly so that it forms a nice cup shape as it bakes.
- Bake for 12 to 14 minutes, or until the cookie edges are golden brown. Keep an eye on them as baking times can vary based on your oven.
- Once baked, remove the pans from the oven and immediately place an unwrapped candy in the center of each cookie cup. The warmth of the cookie will slightly melt the candy, making it gooey and delicious.
- Let the cookie cups cool completely in the pan. This step is crucial as it helps them set properly and makes it easier to remove them.
- Carefully remove the cookie cups from the pans. A small spatula can help to lift them out without breaking.
- Store any leftovers in an airtight container for up to 3 days. If you want to keep them longer, you can freeze them for up to one month.
- Enjoy your sweet creations with friends and family! Share the joy and watch everyone’s faces light up with delight!