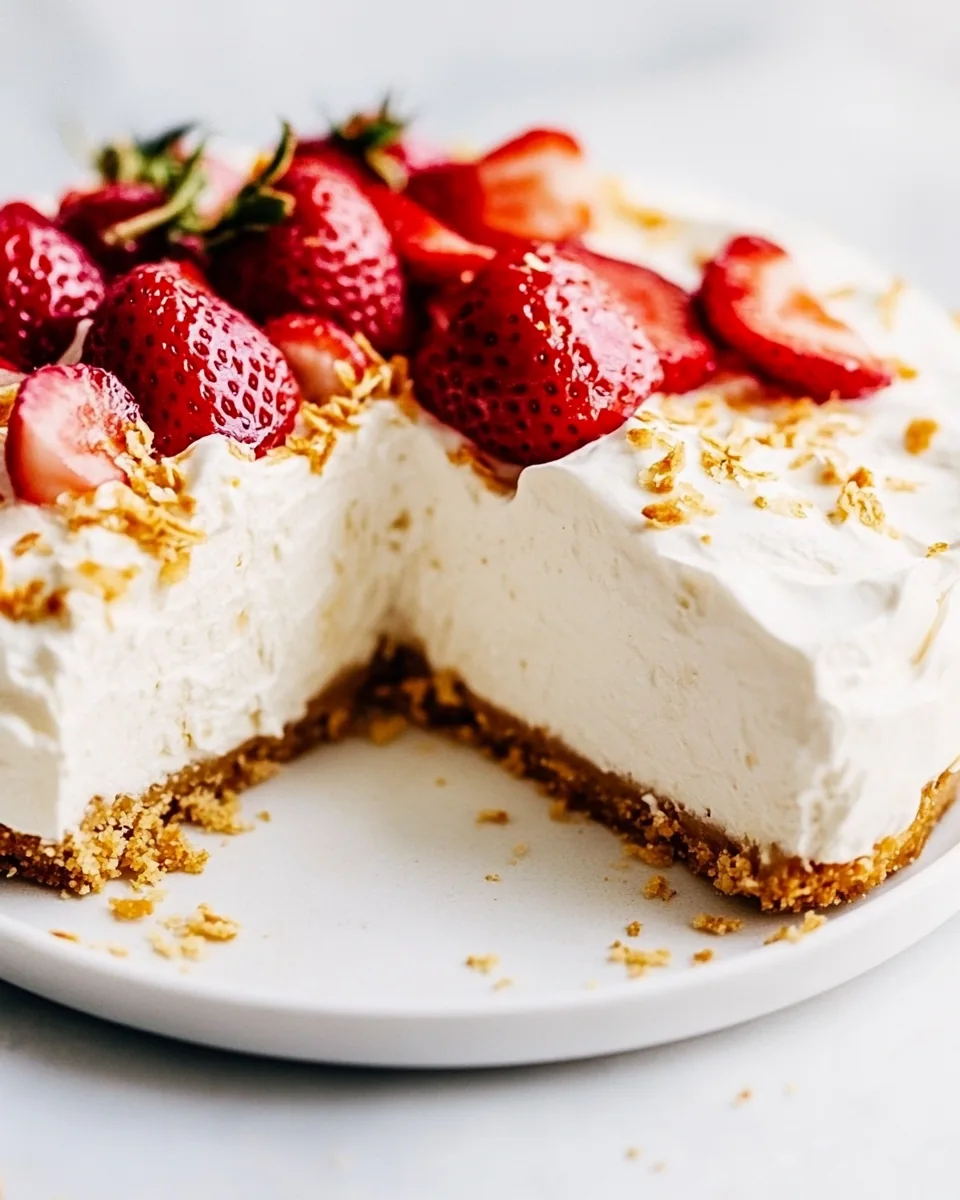
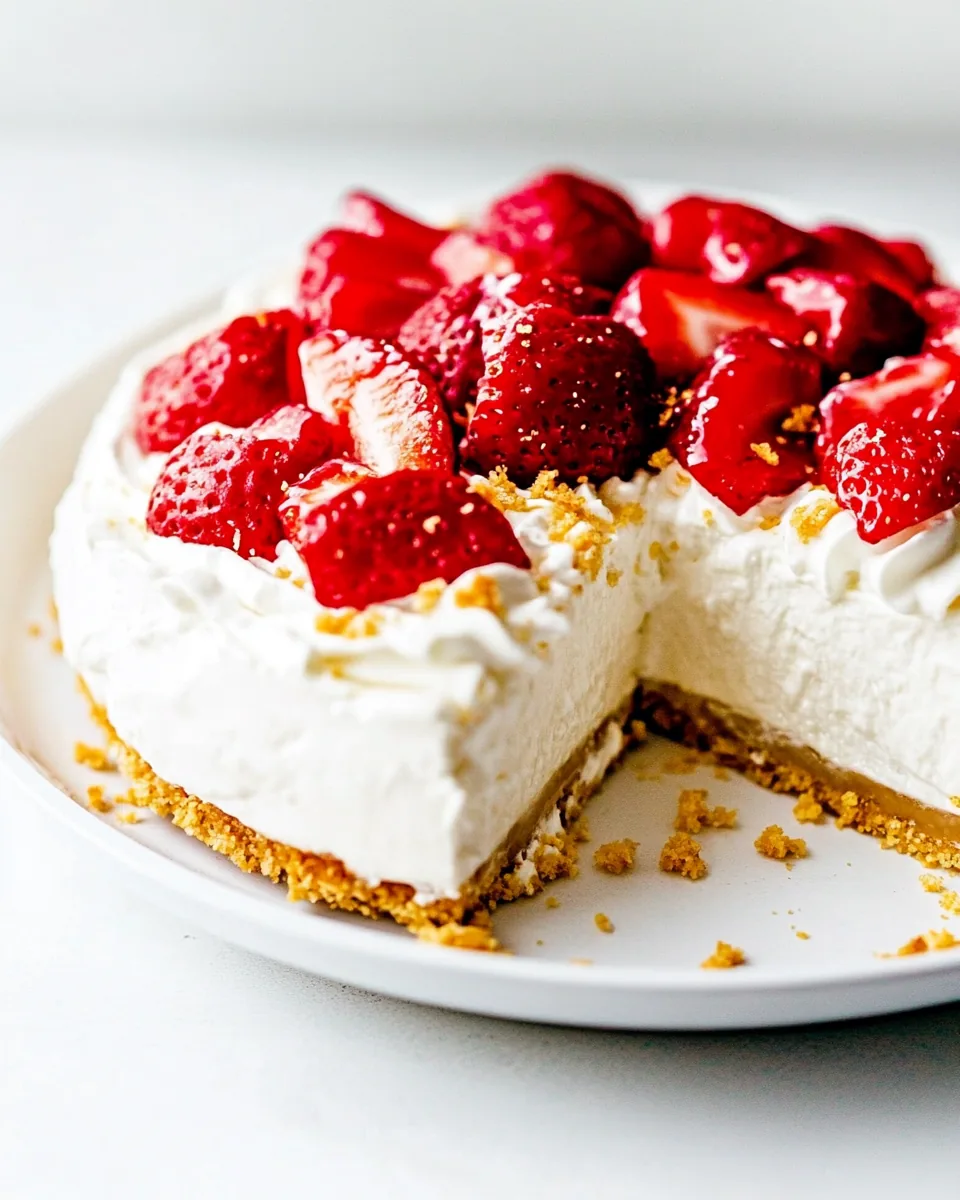
When I think of the perfect dessert to impress friends and family, the No Bake Cheesecake instantly comes to mind. This is no ordinary cheesecake; it’s a creamy, dreamy concoction that captures the essence of summer with each bite. I remember the first time I made it for a potluck gathering. The sun was shining, and we were all craving something light and sweet. The moment I unveiled the cheesecake, jaws dropped, and I couldn’t help but feel a sense of pride. The best part? There’s no baking involved! This means you can whip it up in no time, letting the fridge do all the work while you sit back and relax.
Recipe Snapshot
15 mins
15 mins
0 mins
Medium
350 kcal
5 g
Gluten-Free, Low FODMAP
21 g
Frying Pan, Mixing Bowl
What You’ll Enjoy About This No Bake Cheesecake
It’s Incredibly Easy
One of the things I love about the No Bake Cheesecake is just how simple it is to make. With just a few ingredients, you can create something that tastes like it came from a gourmet bakery. No complicated techniques or hours spent in the kitchen. You’ll be amazed at how quickly you can prepare this delightful dessert.
Perfect for Any Occasion
Whether it’s a summer barbecue, a birthday party, or just a treat for yourself, this cheesecake fits the bill perfectly. It’s refreshing, light, and a crowd-pleaser. I’ve served it at countless gatherings, and it never fails to get rave reviews. It’s the kind of dessert that makes you feel like a culinary genius without all the effort.
Customizable to Your Taste
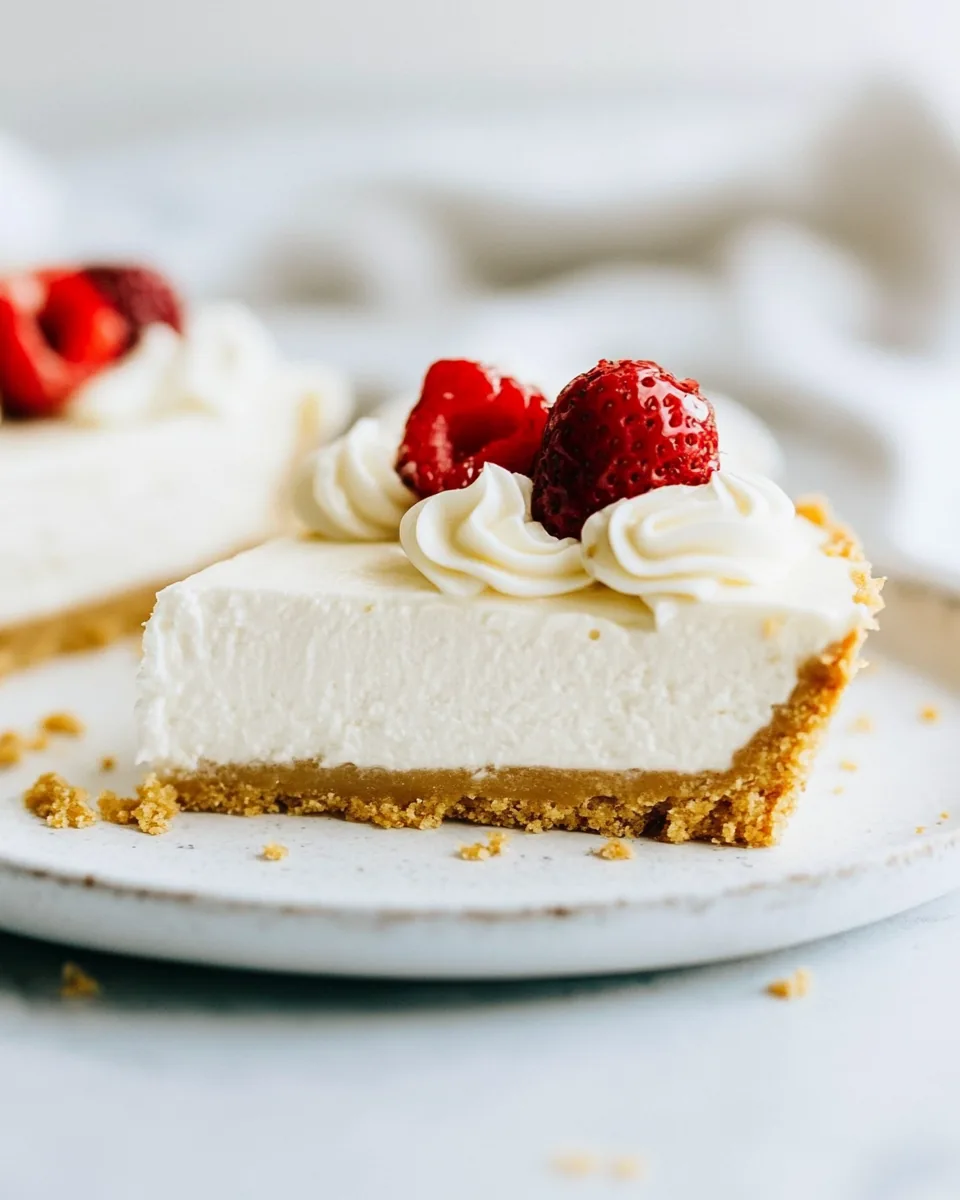
The No Bake Cheesecake is incredibly versatile. You can switch up the toppings to match your preferences. Love strawberries? Add fresh strawberry sauce on top. Prefer chocolate? A drizzle of chocolate ganache transforms it into a decadent treat. The possibilities are endless, allowing you to create a unique masterpiece every time.
Make-Ahead Convenience
Another fantastic aspect is that this cheesecake can be made in advance. I often prepare it the night before a gathering, allowing it ample time to chill and set. This way, when guests arrive, I’m not stuck in the kitchen. Instead, I can enjoy their company while knowing a delicious dessert awaits!
No Special Equipment Needed
You don’t need any fancy tools or equipment to whip up the No Bake Cheesecake. A simple mixing bowl and a springform pan are all you need. Even if you’re not a seasoned baker, you can confidently tackle this recipe. It’s approachable and forgiving, making it a great choice for anyone!
Deliciously Creamy Texture
Lastly, the texture of this cheesecake is to die for. It’s ultra creamy, velvety, and just the right amount of sweet. Each slice melts in your mouth, leaving you craving more. Trust me when I say that once you try it, you’ll want to make it again and again.
Shopping List for No Bake Cheesecake
When it comes to creating the perfect No Bake Cheesecake, the ingredients play a crucial role in achieving that creamy, rich flavor. The combination of the graham cracker crust, smooth cream cheese, and luscious heavy cream works harmoniously together, resulting in a dessert that’s both comforting and satisfying. Let’s take a look at the key players:
- 2 cups graham cracker crumbs – These create the classic crust that holds everything together, offering a sweet crunch.
- ¼ cup lightly packed brown sugar – This adds a hint of molasses flavor, enhancing the crust’s sweetness.
- ½ cup melted salted butter – It binds the crust, giving it texture and richness.
- 2 (8-ounce) blocks softened cream cheese – The star ingredient, providing the cheesecake’s signature creamy texture.
- ½ cup granulated sugar – Sweetens the filling perfectly without overpowering.
- 1 tablespoon lemon juice – Adds a refreshing zing, balancing the richness of the cream cheese.
- 1 teaspoon vanilla extract – Enhances the flavor profile, bringing warmth to the dessert.
- ½ cup heavy whipping cream – Whipped to soft peaks, it lightens the filling, making it airy.
- Strawberry sauce (optional) – A delicious topping that adds color and fruity flavor.
Step by Step Instructions for No Bake Cheesecake
Making the No Bake Cheesecake is a breeze! Follow these simple steps and you’ll have a stunning dessert ready in no time.
- In a medium-sized bowl, add 2 cups graham cracker crumbs, ¼ cup lightly packed brown sugar, and ½ cup melted salted butter. Stir until everything is well combined. You want a mixture that resembles wet sand.
- Next, press this mixture firmly into the base of a 9-inch springform pan. Use the back of a measuring cup to pack it down tightly. This will create a sturdy crust for your cheesecake.
- Place the crust in the refrigerator while you prepare the filling. This allows it to firm up slightly.
- In a large mixing bowl, combine 2 (8-ounce) blocks softened cream cheese, 1 tablespoon lemon juice, 1 teaspoon vanilla extract, and ½ cup granulated sugar. Beat this mixture using an electric mixer until it is smooth and creamy, about 2 to 3 minutes.
- Once the mixture is creamy, slowly add in ½ cup heavy whipping cream while continuing to beat. You want to see the mixture become thicker and fluffier, which should take about 3 to 4 minutes.
- After the filling is fluffy, take out the crust from the refrigerator and spread the cream cheese mixture evenly over the crust. Use a spatula to smooth the top.
- Cover the cheesecake with plastic wrap and return it to the refrigerator. Allow it to chill for at least 3 hours, or overnight if you have time. This helps the cheesecake to set properly.
- When you’re ready to serve the cheesecake, carefully remove it from the springform pan. If desired, drizzle with strawberry sauce for a pop of color and flavor.
- Slice into pieces, serve, and watch your guests rave about how delicious it is!
Things Worth Knowing
- Chilling Time: Make sure to give your cheesecake enough time to chill in the refrigerator. The longer it sits, the better the flavors meld together.
- Crust Texture: Press the graham cracker crust firmly to avoid it falling apart when slicing. A well-packed crust will keep its shape!
- Serving Temperature: Let the cheesecake sit out for a few minutes before serving. This helps achieve a smoother texture.
- Creative Toppings: Experiment with various toppings like fresh fruits, whipped cream, or chocolate shavings for a unique look and flavor.
Tips and Variations

When making the No Bake Cheesecake, there are plenty of tips and variations to consider for that perfect outcome. Here are some ideas:
- Storage: Store any leftover cheesecake in an airtight container in the fridge for up to 3 days. Cover the top to maintain its freshness.
- Freezing: You can freeze the cheesecake for up to 2 months. Just wrap it tightly in plastic wrap and then aluminum foil to avoid freezer burn.
- Pairing: Serve with a dollop of whipped cream or fresh berries for an extra treat.
- Flavor Variations: Try adding different flavors to the filling, such as chocolate or peanut butter, to customize your cheesecake.
- Serving Size: When serving, slice the cheesecake with a hot knife for cleaner cuts.
- Garnishing: Experiment with different sauces for drizzling, like caramel or raspberry, to enhance the presentation.
What to Pair With No Bake Cheesecake
When it comes to serving the No Bake Cheesecake, there are several delightful pairings that can enhance your dessert experience:
- Fresh Berries: Strawberries, blueberries, or raspberries add a refreshing balance to the creamy cheesecake.
- Whipped Cream: A light dollop of freshly whipped cream can add a touch of elegance and sweetness.
- Coffee: Pairing with a rich cup of coffee complements the sweetness of the cheesecake perfectly.
- Seasonal Fruits: Depending on the season, use fruits like peaches or cherries to keep it fresh and vibrant.
- Casual Gatherings: It’s perfect for casual gatherings, picnics, or potlucks where you want to impress without the fuss.
- Light Meals: Serve it after a light summer meal for a satisfying yet not overly heavy dessert.
FAQ
Conclusion
The No Bake Cheesecake stands out not just for its delicious taste but also for its simplicity and versatility. It’s the perfect dessert to whip up when you’re short on time yet want to impress guests or indulge yourself. I encourage you to try it out and customize it to your taste. You won’t regret bringing this delightful treat to your table!
No Bake Cheesecake
Ingredients
Equipment
Method
- In a medium-sized bowl, add the 2 cups graham cracker crumbs, ¼ cup lightly packed brown sugar, and ½ cup melted salted butter. Stir until everything is well combined. You want a mixture that resembles wet sand.
- Next, press this mixture firmly into the base of a 9-inch springform pan. Use the back of a measuring cup to pack it down tightly. This will create a sturdy crust for your cheesecake.
- Place the crust in the refrigerator while you prepare the filling. This allows it to firm up slightly.
- In a large mixing bowl, combine 2 (8-ounce) blocks softened cream cheese, 1 tablespoon lemon juice, 1 teaspoon vanilla extract, and ½ cup granulated sugar. Beat this mixture using an electric mixer until it is smooth and creamy, about 2 to 3 minutes.
- Once the mixture is creamy, slowly add in ½ cup heavy whipping cream while continuing to beat. You want to see the mixture become thicker and fluffier, which should take about 3 to 4 minutes.
- After the filling is fluffy, take out the crust from the refrigerator and spread the cream cheese mixture evenly over the crust. Use a spatula to smooth the top.
- Cover the cheesecake with plastic wrap and return it to the refrigerator. Allow it to chill for at least 3 hours, or overnight if you have time. This helps the cheesecake to set properly.
- When you’re ready to serve the cheesecake, carefully remove it from the springform pan. If desired, drizzle with strawberry sauce for a pop of color and flavor.
- Slice into pieces, serve, and watch your guests rave about how delicious it is!